About Chris Taylor: Chris is on the Community Review Board for SANS’s OUCH! (the security awareness newsletter designed for everyone), has given over 470 computer-related presentations at the Ottawa Public Library, and is President of the Ottawa PC Users’ Group.
One of the most critical security measures you can take is implementing an effective backup strategy. That way, no matter what might fail, you don’t lose your data. I have written many times in Cybersecurity News about backups.
A wonderful utility that comes with Windows is File History (https://mailchi.mp/glasswire/glasswire-newsletter-how-to-detect-a-hidden-camera-in-your-room). While it doesn’t replace either a good image backup or an off-site backup, it provides two capabilities other means of backup usually lack: near-real-time backup and versioning.
Near-real-time backup means that even in a catastrophic failure, you need not lose more than 10 minutes worth of your work. File History can backup new or changed files as frequently as every 10 minutes.
Versioning provides access to potentially years of versions of your important data files. You can easily recover data files as they existed 15 minutes ago, two weeks ago, or a year ago last June.
But what about when you move to a new computer? If you simply move the drive being used for File History to the new computer and go through the normal steps to turn on File History, you will find that none of your previous versions of files show up when you right-click a file, choose Properties, and click the Previous Versions tab. The old versions of files are still on the drive used for File History; they are just not easily accessed.
Fortunately, with a couple of extra steps, you can have all the old versions show up on the Previous Versions tab.
First, connect the drive used for File History on the old computer to the new computer. Don’t use Settings | Update & Security | Backup | Backup using File History to configure File History. If you do, it will configure a new File History on the drive and you will lose your ability to recover the old versions of files through the normal means mentioned above.
Click the Start button and type Control Panel. When it appears at the top of the results pane, click it and choose File History (if Control Panel is in Icon view) or Save backup copies of your files with File History (if Control Panel is in Category view).
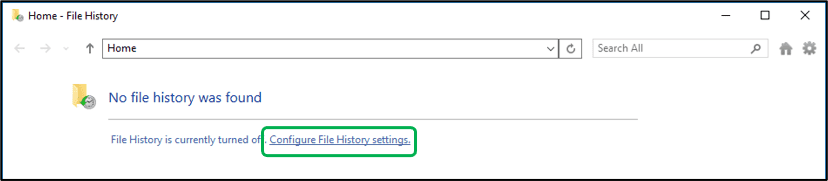
Click on Configure File History settings. Note: you may not see this initial dialogue box. It might go directly to the following.
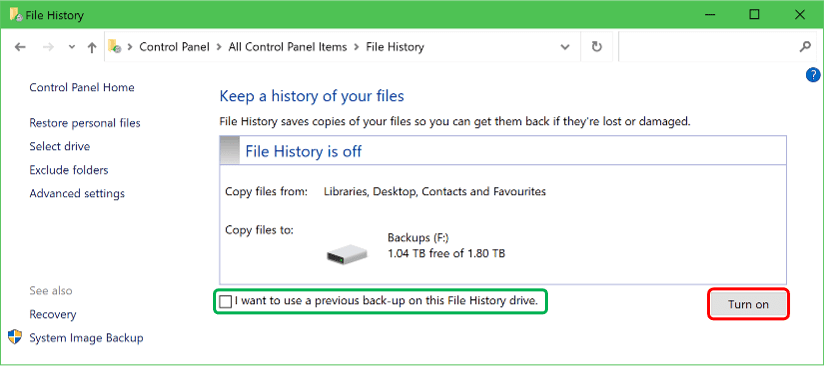
Don’t click the Turn on button…yet. Put a check mark in the box for I want to use a previous back-up on this File History drive.
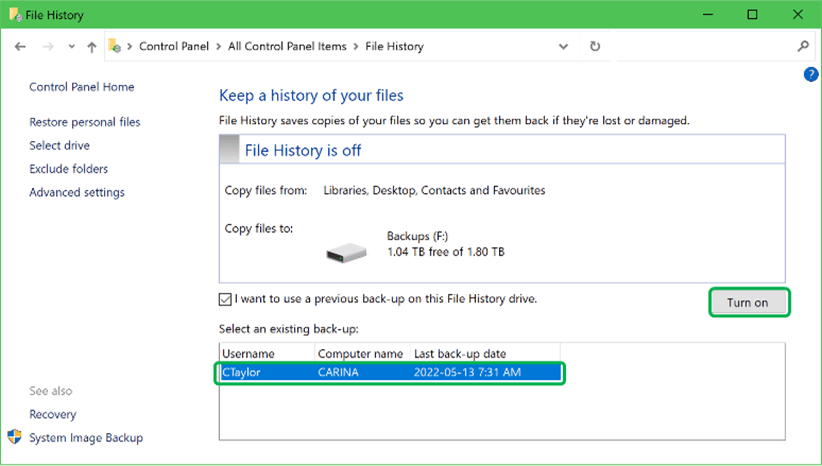
Select your existing back-up in the lower box and then click the Turn on button.
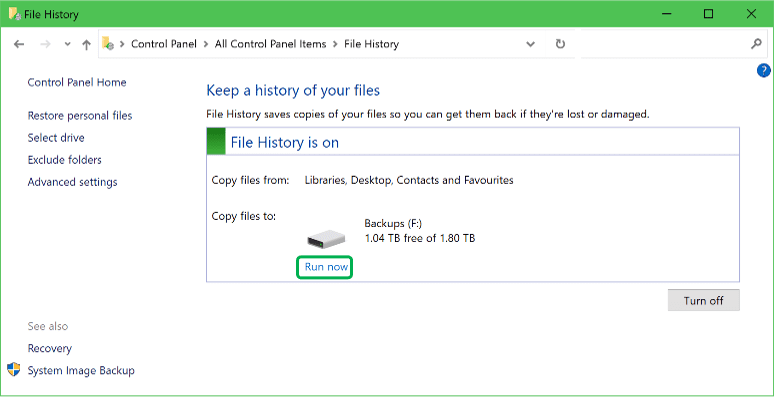
File History will probably run automagically, but if it doesn’t, you can click Run now.
File History will then run with the default set of folders to be backed up. Having selected the option earlier to use a previous back-up, this backup will be integrated into the existing File History set, rather than creating a fresh configuration.
Most people moving to a new computer probably restore their data files from a different restore regime, but if you have not done so, you can restore your files from the File History that was run on the old computer.
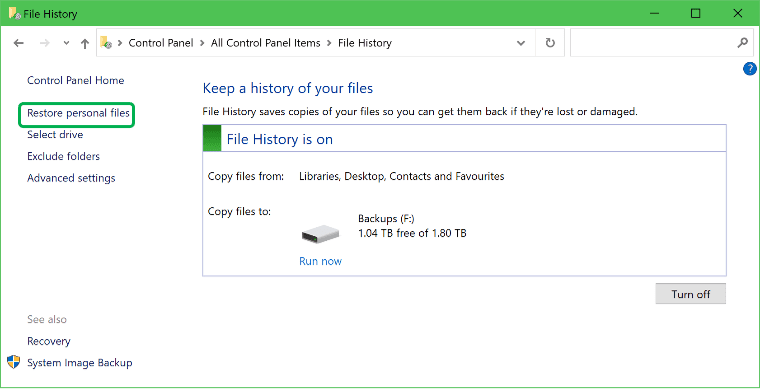
Click on Restore personal files and File History will open and show the latest backup in the set, which will be the one you just ran on the new computer.
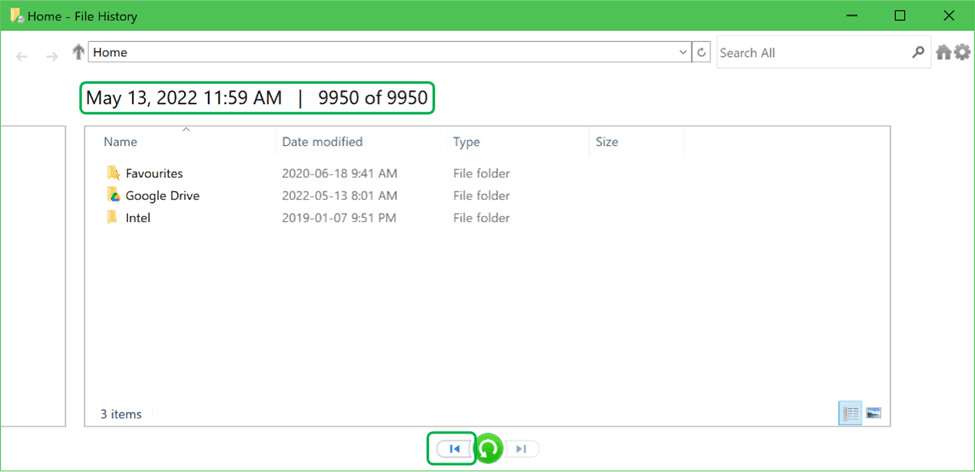
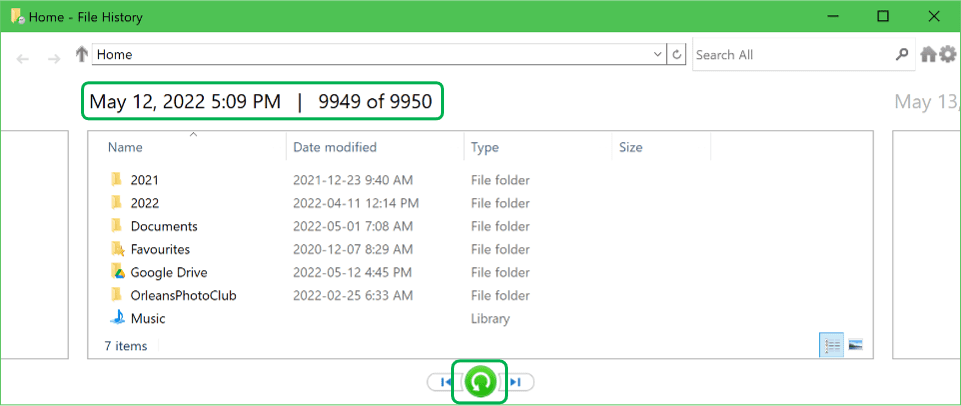
Click the Previous version button at the bottom. This will bring you to the last backup run on the old computer.
With nothing selected in the main window, click the Restore to original location button at the bottom. This will restore the latest version of all files to your new computer.
Fly in the ointment
The File History dialogue box does not have an option to restore files to a different location. If you were backing up files from Z:\Data on the old computer and you don’t have a Z: drive on the new computer, you will get an error.
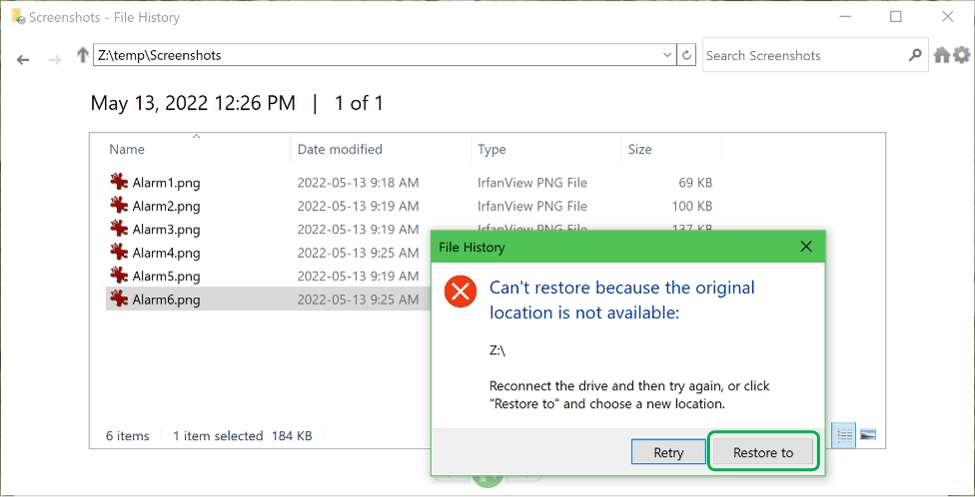
If this happens you can click on the Restore to button and select a different location. Another option would be to connect an external drive, at least temporarily, and assign it the Z: drive letter.
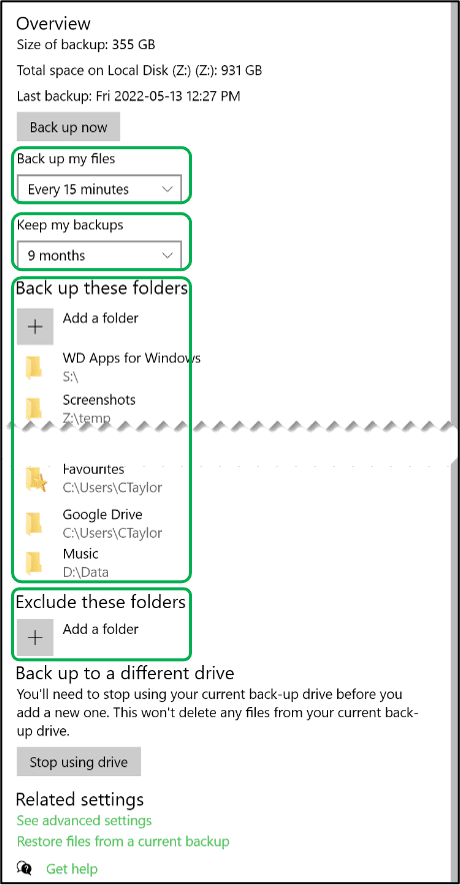
Since File History on the new computer is in the default configuration, you should configure it now. Run Settings | Update & Security | Backup | Backup using File History | More options. The settings you probably want to configure are frequency of backup, period to keep backups, and folders to backup/exclude.