
If you’re a Windows user who cares about data usage, you’ve got a lot to be happy about. Windows 11 includes a built-in data tracker, satisfying a longstanding community request.
Monitoring data usage is a good idea, even if you’re not a proud IT nerd. If you’re on a plan with capped traffic, paying attention might save you from exceeding your maximum.
Traffic monitoring is also a smart way to stop malware that uses data in the background. Long story short, it’s nice to finally have the option in Windows.
Sounds like a perfect world right? Not so fast. The default data tracker is nice, but it’s not quite perfect. Here’s how it works and why you might prefer alternatives like GlassWire.
Monitor your data usage in Windows 11
The built-in tool is easy to find. Just open up your Settings and then click on Network and Internet.
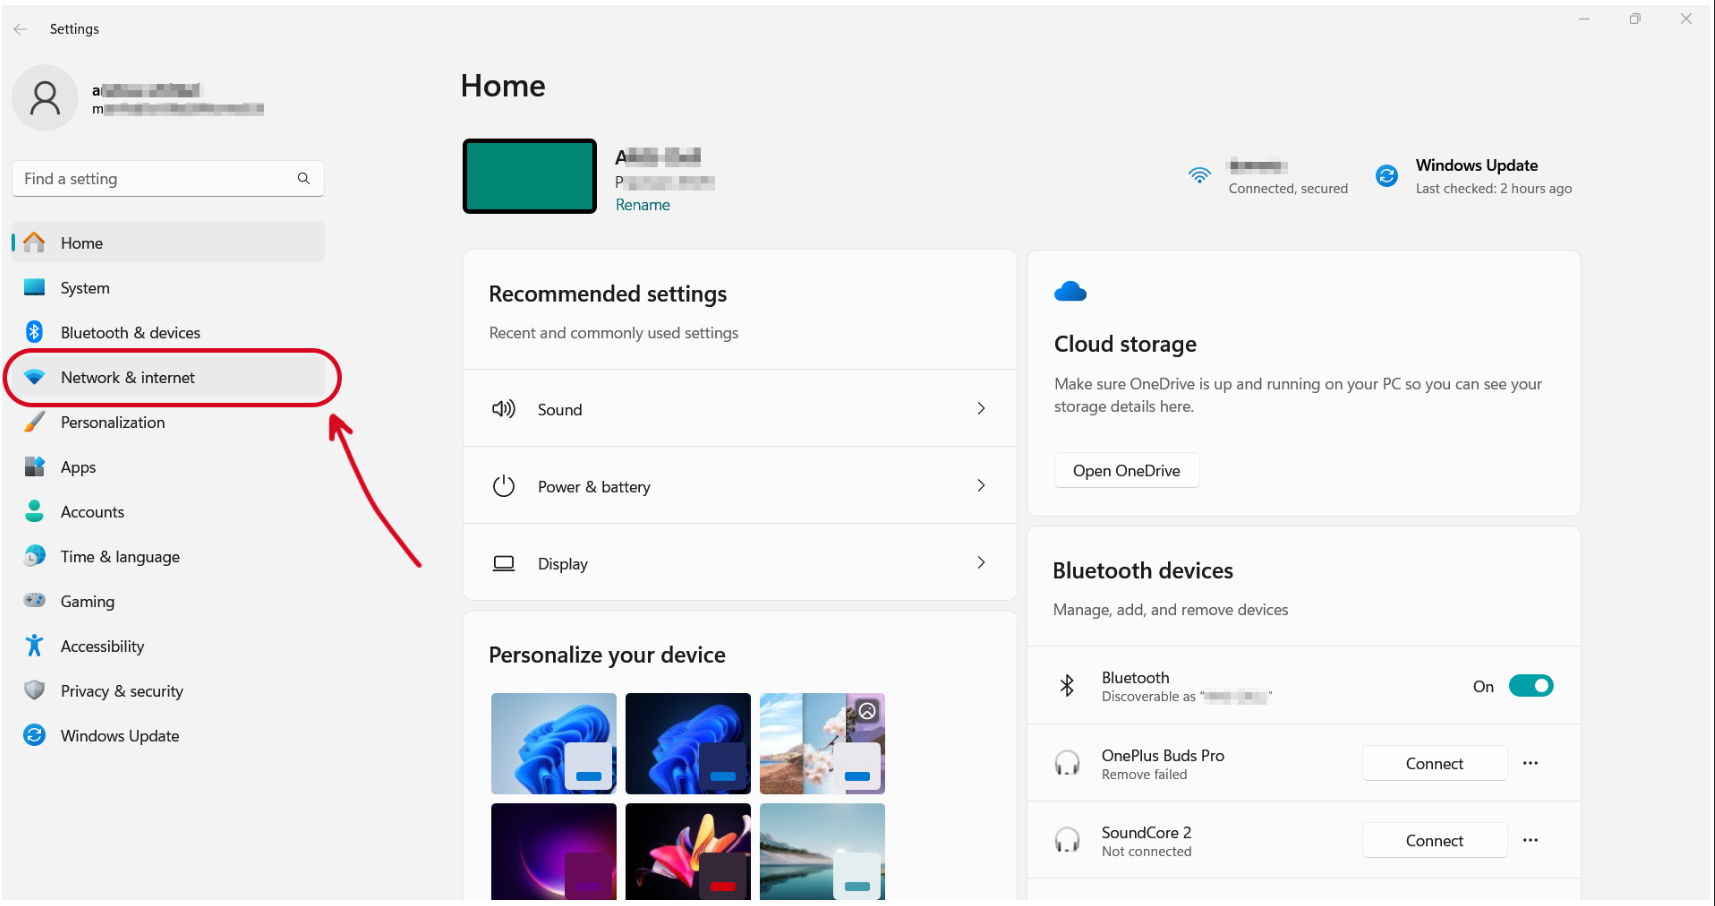
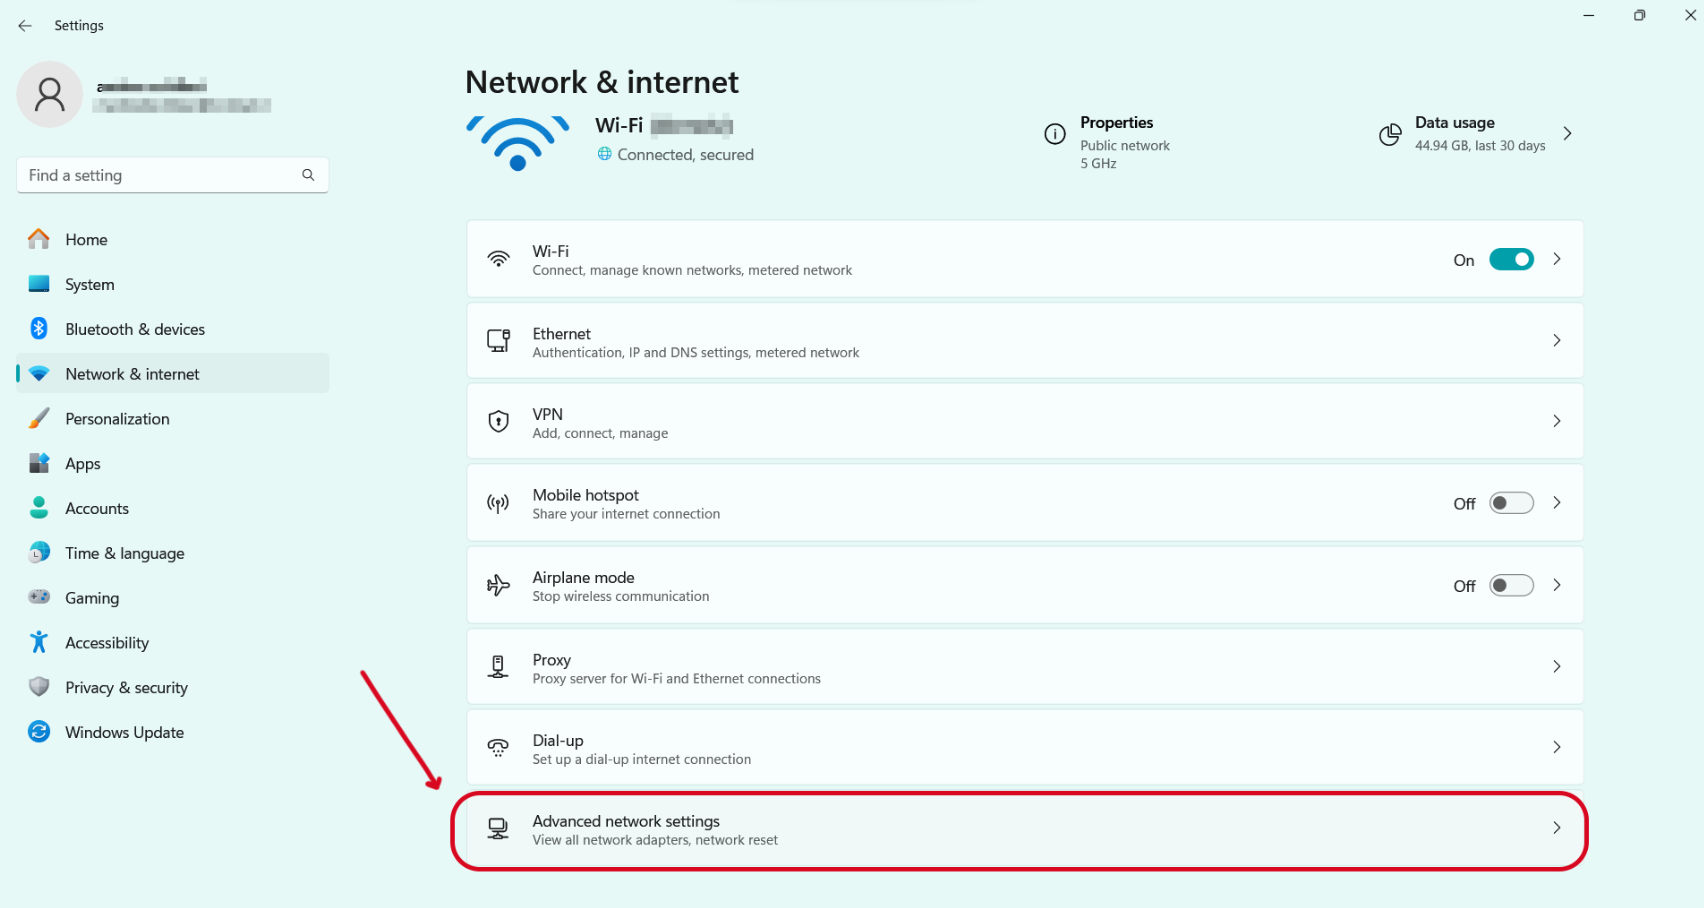
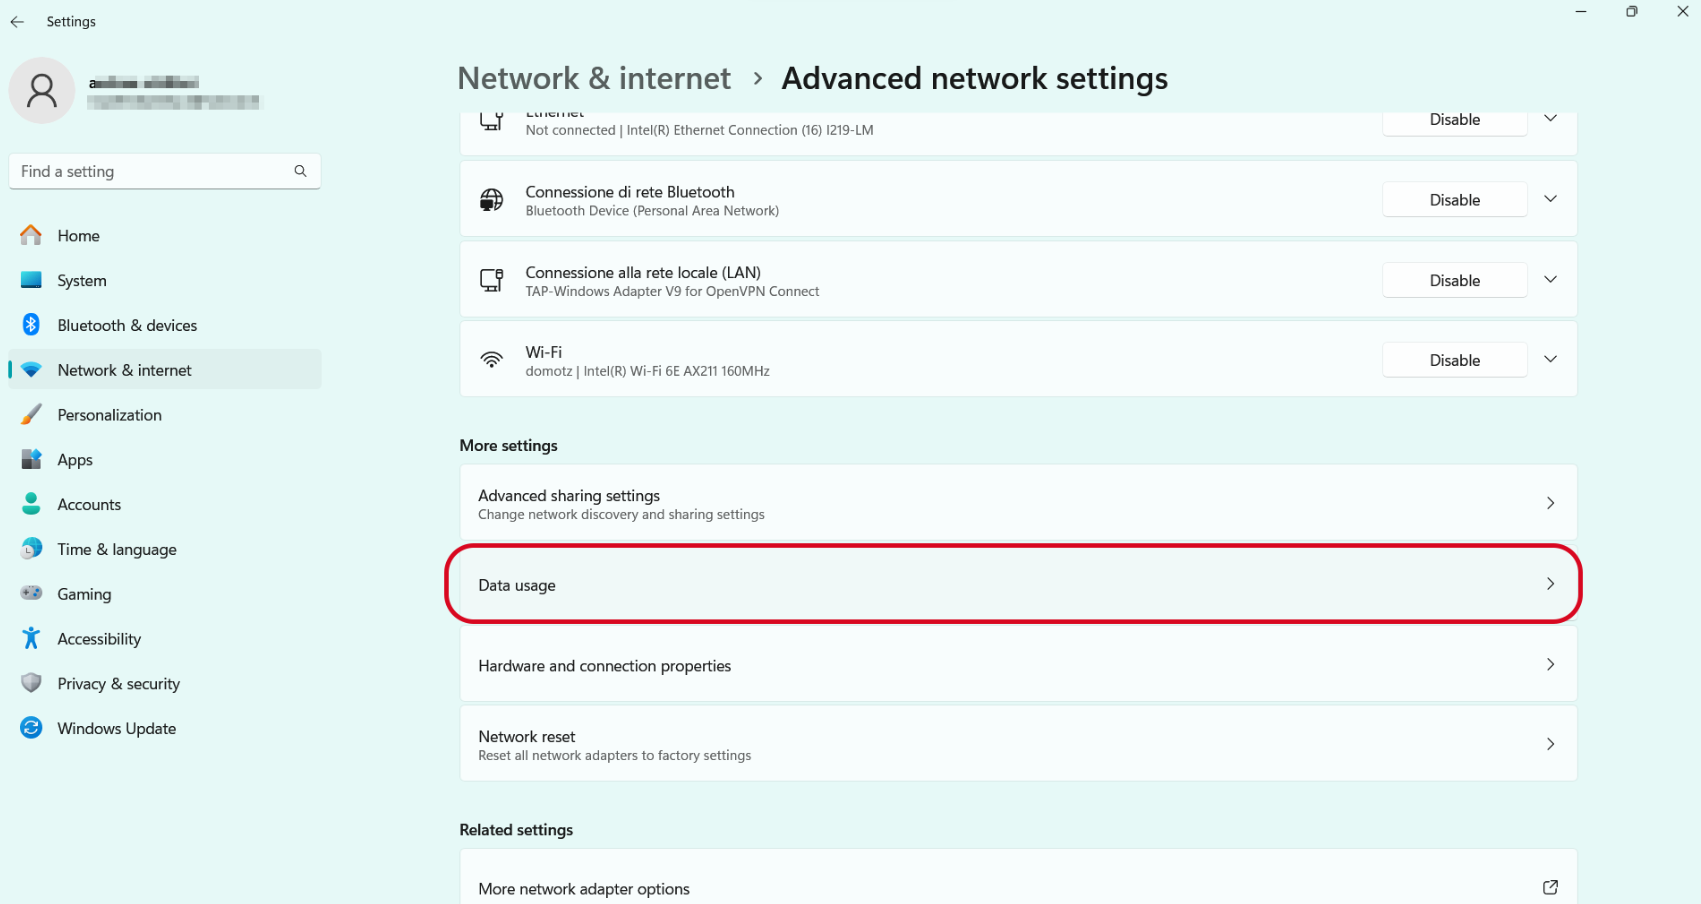
Now, navigate to the Advanced network settings tab on the side of the settings window. If you look under the header that says More settings, you’ll see an option called Data usage. Click this to continue.
The data usage pane will show you a few interesting items. Highlights include:
- A numeric total representing the amount of data you’ve used over the last 30 days
- A space where you can enter a data limit
- An area where you can select a specific network adapter to focus on, such as Ethernet or Wi-Fi
- Usage statistics that show which applications recently used the most data
- A reset button that rolls back your history information, zeroing out the usage counter
Set a threshold for your data in Windows 11
What if you want to set a hard cap on how much data you use? Once again, Microsoft keeps things nice and simple.
Navigate to the data usage section as before. Click on the button that says Enter limit, in the top right corner of the pane.
You should see a popup window. Here you can specify a limit type (monthly, one-time, or unlimited) and a total data threshold (in GB or MB).
You can also pick a reset date for when the counter will automatically roll back to zero. This option is helpful if you’re on a monthly billing plan.
Once you’ve set a limit, the Data usage interface will change to show your remaining usage. You’ll also gain options to remove the limit or enable “metered connection” mode to make the most of your remaining allowance.
Use GlassWire to monitor your data usage
As we mentioned above, Windows 11 data usage tracking is basic — some might even call it bare-bones. Although this is convenient, it lacks power.
If you truly want to get things done, you’ll upgrade to a tool like GlassWire. GlassWire lets you monitor usage by IP addresses, communication destinations, connections, and processes. You’re not limited to a general outlook; you can see the big picture without missing the nuances along the way.
One thing GlassWire has in common with Windows 11 is its simplicity of use. Even though you get more information, it’s just as easy to start monitoring.
To begin, launch the GlassWire app and head to the Traffic Monitor tab. You’ll immediately see how much bandwidth you’re using each month. Unlike with Windows, you’ll also notice your current network traffic is broken down by uploads, downloads, and adapters.
Another distinguishing feature that instantly springs out is the graph view. Instead of settling for a single number or a progress bar-style display, you get a time-based chart.
Why is the time layout so helpful? Simply put, it shows you not only how much data you used but also when specific events occurred. In other words, you can intuitively guess which activities correspond to the biggest usage peaks.
GlassWire also lets you choose how to divvy up the wealth of information it provides. Want to see a time-series layout for a specific program or process? Select the Apps option. Feel like zeroing in on a certain type of activity? Choose the Traffic option. Best of all, you’re not limited to monthly timeframes like with the native tool.
Set a threshold for your data with GlassWire
GlassWire is also your ace-in-the-hole for setting configurable thresholds. Navigate to the app’s Settings, and then choose the Data Plan option.
You should see some options appear. You can choose a timeframe, start date, and bandwidth limit amount. You can also receive desktop notifications when you hit the cap.
Try GlassWire’s advanced data usage features today!
GlassWire also gives you more tools to control data usage. For instance, with “Ask to connect” mode enabled, you’ll see a confirmation popup whenever an app wants to use data for the first time.
Ask-to-connect mode is a must-have in a world of streaming media and data-heavy cloud apps. Modern programs like these often download a ton of information when they get started. Receiving a convenient heads-up helps a lot.
You can also block problematic apps since GlassWire is a full-fledged network management system. All it takes is clicking to disable the programs you want to forbid under the Firewall screen. You can even configure different firewall profiles for individual use cases, like if you’re on a home network or out using your cellular data plan.
Windows 11 is a great OS, and its data usage tool is definitely handy. But it can only achieve so much without giving you a headache. Take full control of your traffic by downloading GlassWire for free.


